How to set up a Python Jupyter EC2 instance (Ipython) in 5mins.

Have you ever came across a scenario like this:
You have realized that the Jupyter cell you have just executed might take some while to finish hence you decided to go out for a walk then check back in a couple of hours later. And guess what happened in two hours?
You’re running to your laptop to see a big fat memory error on your screen or it may still be running or it may look like it's still running and suddenly you realize that everything was frozen like Elsa’s Snow Castle.
The first thing you wanna do is to take out that AK47 you’ve been hiding for so long and shoot 120 times for exactly every minute it costed you!
Trust me I know the feeling. Been there, Done that (Not exactly).
So I was thinking of a solution to tackle this issue? And here it is:
That’s right. We’re going to use the Amazing Web Services (See what I did there!) to create a Jupyter EC2 Instance in just 5 minutes.
What’s the only thing better than an interactive Python notebook? An interactive Python notebook with fast and easy data connectivity, of course!
The Craziest part is that this tutorial has only 3 steps. So Let’s kick it off!
Step 01 — Creating the Jupyter Instance
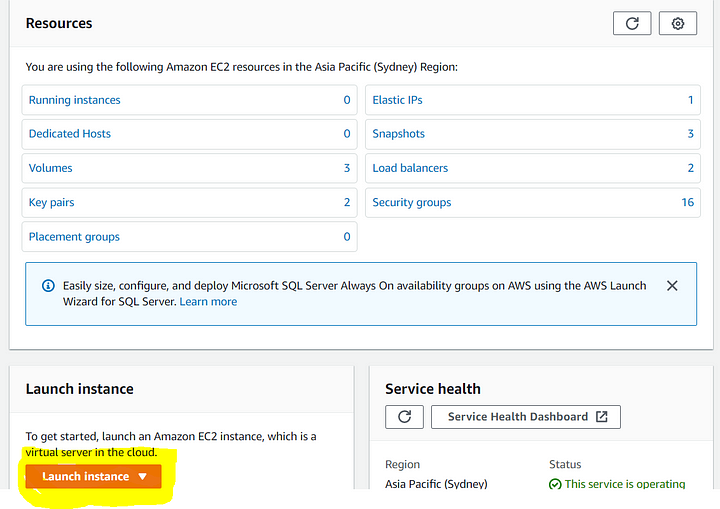
First things first: Login to your AWS console and go to EC2 services then Launch an Instance.
Then go to the Community AMI in the left pane and search for the AMI: ami-0e890bc418fa831ca Which is a Python Jupyter Instance which I have used.
Also, It doesn’t have to be that AMI specifically, You can just search for Jupyter notebook and there are hundred of Jupyter Notebooks that you can use.
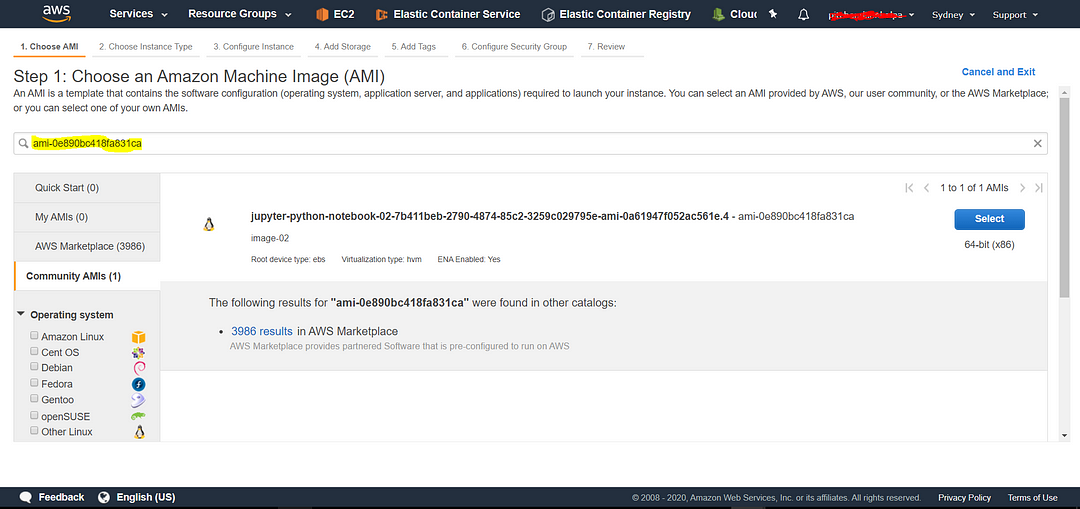
Click on Select which will redirect you to this screen where you can select the instance type.

Now, this is an option depends on you and what specs you want from your instance.
There’s this easy Instance Type compare thingy that I have found on the internet. Go check it out.
In my case, I want to use one of the best performances that I could and I went for r3.8xLarge which costs $3 USD per hour which I do not recommend if you’re not in a budget to use that much.

Here are some useful resources to get more knowledge about EC2 instance types and why I have used r3.8xLarge.
- https://cloudacademy.com/blog/aws-ec2-instance-types-explained/
- https://www.apptio.com/emerge/r4-16xlarge-vs-x1-16xlarge-comparing-cost-efficiencies-memory-giants/
- https://blog.treasuredata.com/blog/2016/07/26/testing-big-data-in-pandas-with-aws-ec2-instance-r3-8xlarge/
- https://aws.amazon.com/marketplace/pp/TechLatest-Cloud-IDE-for-Python-using-Jupyter-Visu/B07YC76GSZ#pdp-pricing
After you have chosen the instance type, Click on Next till you see the security setting window (Leave all the other windows as it is).
Now here are some important ports that you need to allow:
- HTTP: Port 80
- Jupyter Server: Port 8888
- HTTPS: Port 443
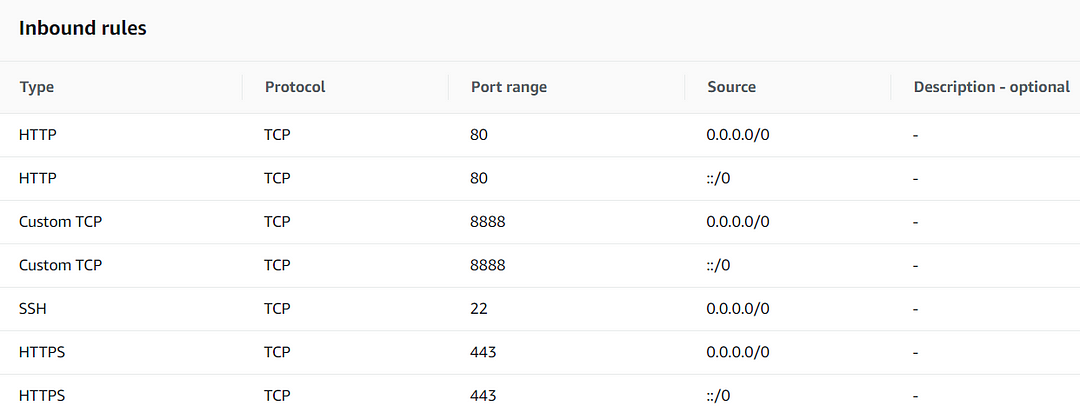
After you finished setting up the ports click on next and Finish the EC2 instance create wizard.
PS: Remember to save your keypair file somewhere safe.
Step 02: Create user Profiles for the Instance.
Alright, your first step is done. Now in order to access the instance, We can use Putty.
Step 1 — Open Putty
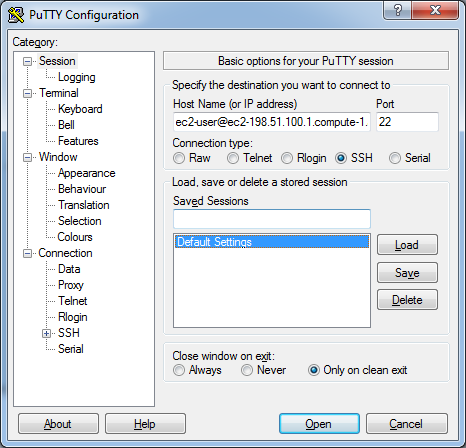
In the Host Name field, You need to copy your public DNS name and paste it here. To find your Public DNS name; Go to the EC2 instance and under properties, you’ll find it.

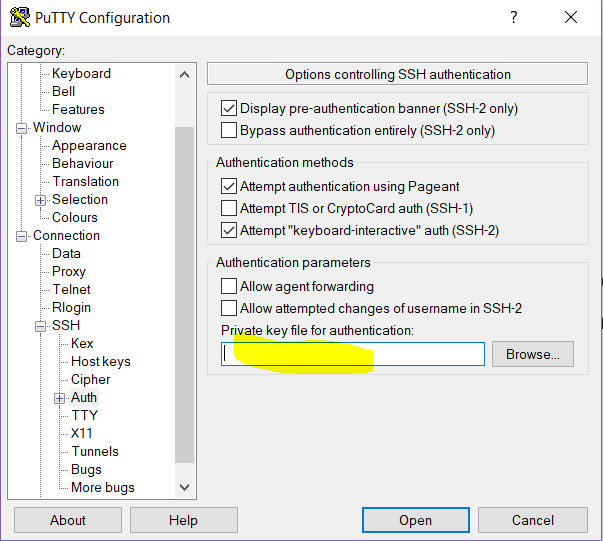
Step 2 Upload the Key Pairs and Connect!
Step 3 Create a User
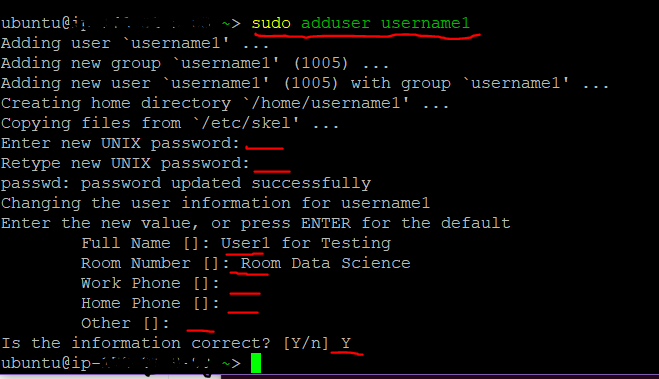
As you can see in the above image: By using the following command, I’m adding a new user called UserName1 to our Jupyter Server
sudo adduser username1
Then it will ask you a UNIX password and you can give the account any password you like. (Use a strong one)
After that, Fill in the basic details and confirm the information and Voila!
We are good to go now!

Step 03: Let’s use Jupyter on AWS
Copy your Public DNS name and paste it on the browser’s address field which will give you a welcome screen like this:
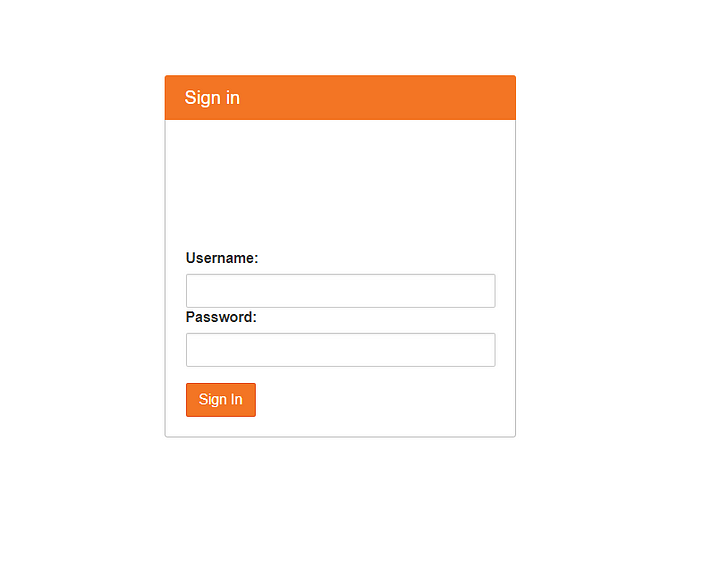
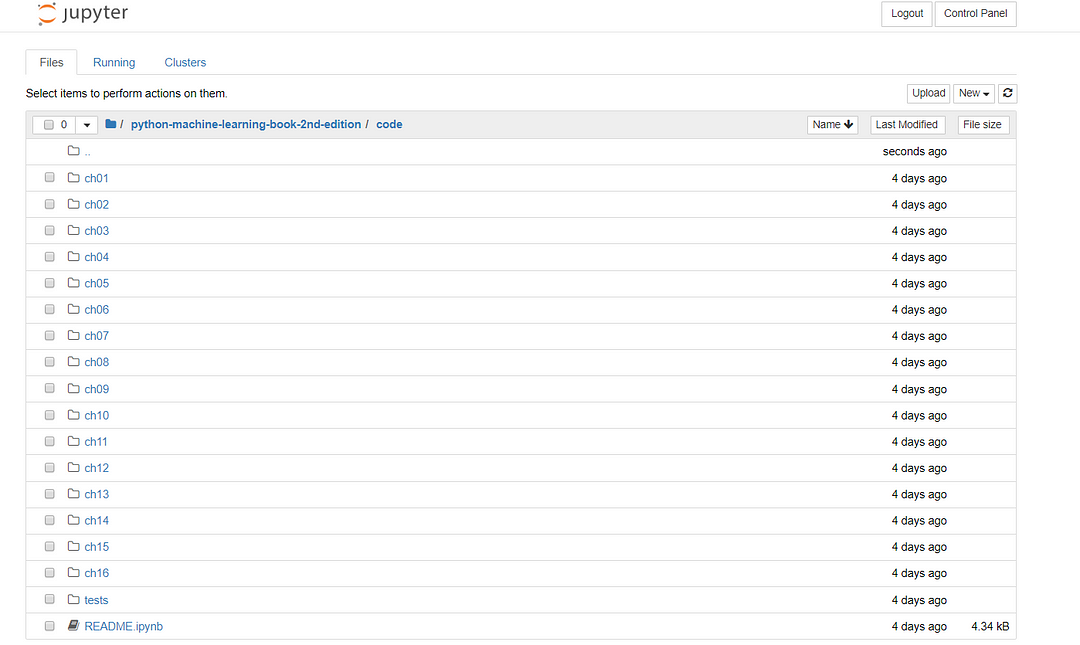
Enter the username and password for the account you have created and it will redirect you to this beautiful Jupyter Home where you can start doing analysis without getting your laptops frozen.
Thanks so much for staying till the end. If you have any questions or concerns regarding this feel free to write a response below or shoot a tweet here or message me on LinkedIn.
You may spend more than 5 minutes reading the article, But try to create it it will not take more than 5 minutes for sure!
Here are some more articles related to AWS and It’s Amazing Web Services :)
In this article, I'm going to guide you through step by step on how to create a GitHub enterprise server on AWS Ec2…www.jayasekara.blog


0 Comments