How to migrate all the data from Azure SQL to Google BigQuery?
In this article, I’ll guide you through the steps of how to migrate your Microsoft Azure database to Google BigQuery, The reason behind action is I want to create a Data Warehouse using BigQuery and with the help of Google Data Studio, Reporting and Dashboard feature stands as the top step of the ladder. So let’s kick things off.
To accomplish the task I’m using StitchData, a third-party software as a service provided by Stitch Inc.

Connecting Microsoft Azure
Microsoft Azure setup requirements
To set up Microsoft Azure in Stitch, you need:
- Privileges in Microsoft Azure that allow you to create/manage users. This is required to create the Stitch database user.
Step 1: Configure database connection settings
In this step, you’ll configure the database server to allow traffic from Stitch to access it. There are two ways to connect your database:
- A direct connection will work if your database is publicly accessible.
- An SSH tunnel is required if your database isn’t publicly accessible. This method uses a publicly accessible instance, or an SSH server, to act as an intermediary between Stitch and your database. The SSH server will forward traffic from Stitch through an encrypted tunnel to the private database.
I choose to go with a direct connection and I’ll detail guide you on SSH Tunnel in a separate article.
For the connection from Stitch to be successful, you’ll need to configure the firewall for your instance to allow access from our IP addresses.
Read more about Azure SQL database firewall configurations here.
- Sign in to your account.
- If you aren’t automatically brought to your dashboard, navigate there.
- In the sidenav, click SQL databases.
- On the page that displays, click the name of the database you want to connect to Stitch.
- The details page for the database will display. Click the link in the Server name field.
- The details page for the server will display. Click the Show firewall settings link in the Firewalls and virtual networks field.
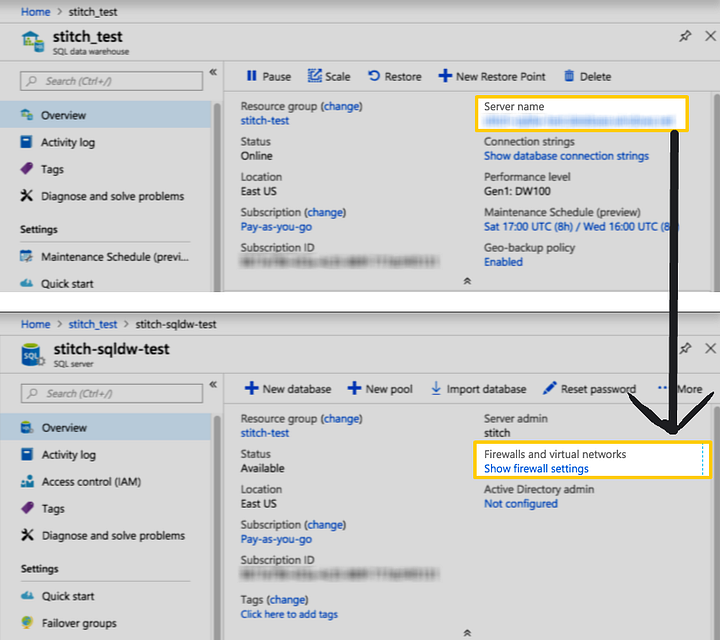
7. For each of Stitch’s IP addresses listed below, create a rule:
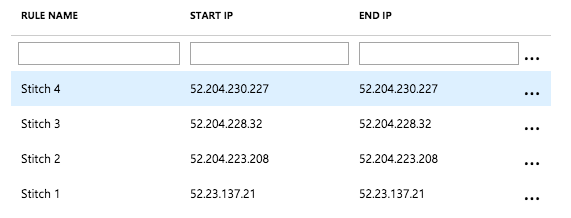
- Rule name: Enter a name for the rule. For example:
Stitch <number> - Start IP: Paste one of Stitch’s IP addresses.
- End IP: Paste the same IP address.
Stitch’s IP addresses are:
52.23.137.21
52.204.223.208
52.204.228.32
52.204.230.227
8. Click the three dots to the right of the End IP field to add the rule.
9. Repeat steps 7 and 8 until there is a rule for each IP address. The screen should look similar to the following when you’re finished:
Step 2: Create a Stitch database user
Create a Stitch user in your SQL Database. This will ensure Stitch is visible in any logs or audits, and allow you to maintain your privilege hierarchy.
Creating a user with SELECT privileges can either be done via a query or the Microsoft Azure UI. In this section, we’ll walk you through using the query method since I always prefer typing code instead of UI settings (AND YOU SHOULD TOO :) )
Open your Microsft SQL Server Management Studio and connect to your database.
- Log into your database.
- Create a SQL login for the Stitch database user:
CREATE LOGIN <stitch_username> WITH PASSWORD=’<password>’ go
3. Grant the Stitch user access to the database:
USE <database_name> go
4. Create the Stitch database user and map them to the database:
CREATE USER <stitch_username> FOR LOGIN go
5. Grant the Stitch user SELECT privileges. To grant SELECT privileges to all tables in the database, run this command:
GRANT SELECT to <stitch_username> go
6. If you want to limit the Stitch user to specific tables, run this command instead:
GRANT SELECT ON <schema_name>.<table_name> TO <stitch_username> go
Step 3: Connect Stitch
- If you aren’t signed into your Stitch account, sign in now.
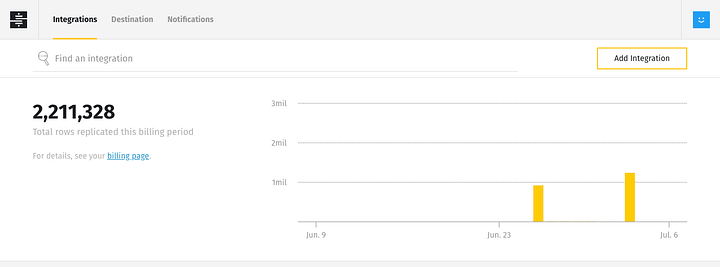
- On the Stitch Dashboard page, click the Add Integration button.
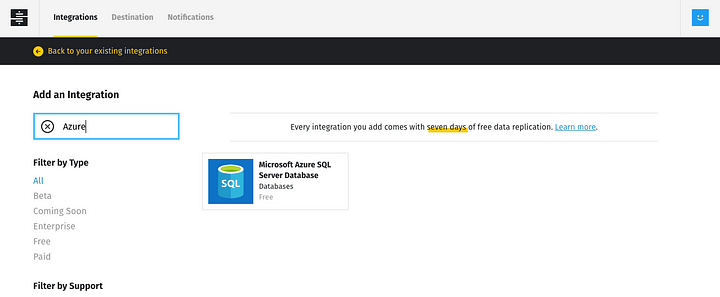
3. Search for “Azure”and click the Microsoft Azure icon.
4. Fill in the fields as follows:
- Integration Name: Enter a name for the integration. This is the name that will display on the Stitch Dashboard for the integration; it’ll also be used to create the schema in your destination.
- For example, the name “Stitch Microsoft Azure” would create a schema called
stitch_microsoft_azurein the destination. Note: The schema name cannot be changed after the integration is saved. - Host (Endpoint): Enter the host address (endpoint) used by the Microsoft Azure instance. For example: This could be a network address such as
192.68.0.1, or a server endpoint likedbname.hosting-provider.com. - Port: Enter the port used by the instance. The default is
1433. - Username: Enter the Stitch Microsoft Azure user’s username. We recommend copying and pasting the username Microsoft Azure displays to you directly into this field. Note: Verify that the name includes
'@domain'or you’ll run into connection issues. - Password: Enter the password for the Stitch Microsoft Azure database user.
- Database: Enter the name of the default database Stitch will connect to. Stitch will ‘find’ all databases you give the Stitch user access to — a default database is only used to test and complete the connection.
Step 4: Schedule Replicate Frequency
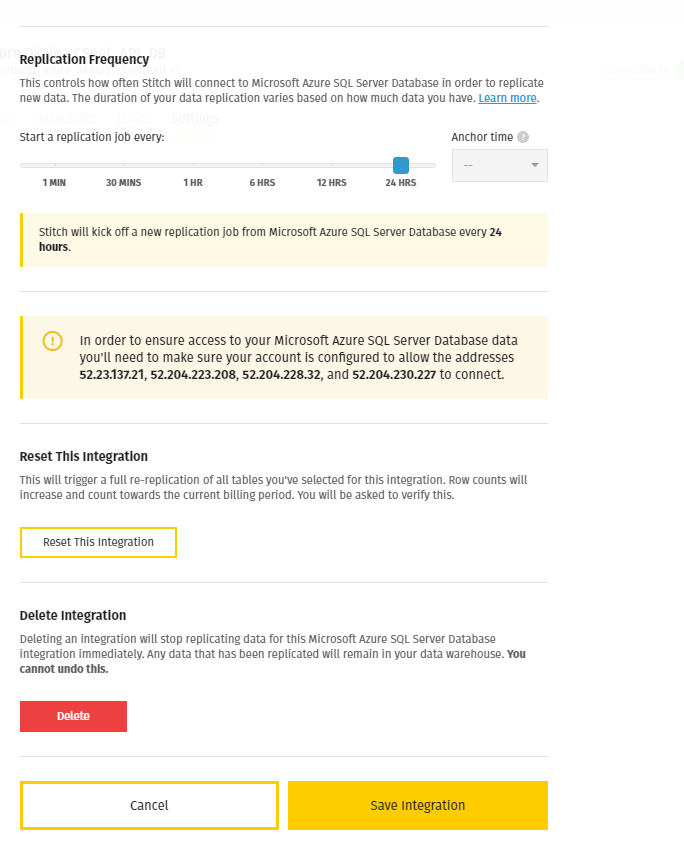
So, First things first, We have to select a replication frequency that means given the time frame that our replication jobs run within. According to Stitch’s Documentation Replication Frequency is defined as “A type of replication scheduling that runs replication jobs based on a time interval you specify.”
Read more on How Replication Frequency Works.
Step 5: Select Data to Replicate
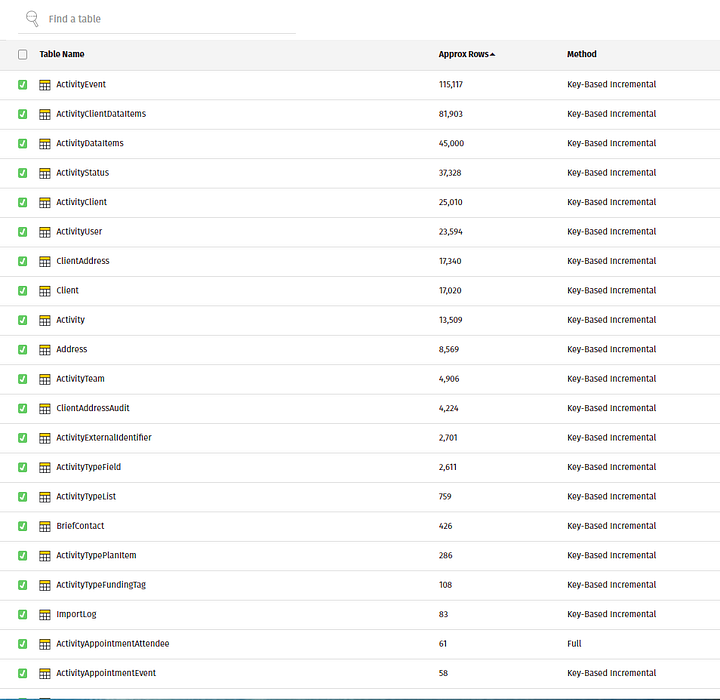
The last step is to select the tables and columns you want to Sync and replicate. (Because in my scenario, I have 165 SQL Data Tables in my database and there are 42 Tables that has no record in it so It’s a waste of time and cost if I’m going to extract all those empty tables.)
When you track a table, you’ll also need to define its Replication Method and, if using Key-based Incremental Replication, its Replication Key.
You can select tables and columns by:
- In the Integration Details page, click the Tables to Replicate tab.
- Locate a table you want to replicate.
- Click the checkbox next to the object’s name. A green checkmark means the object is set to replicate.
- If there are child objects, they’ll automatically display and you’ll be prompted to select some.
- After you set a table to replicate, the Settings page will display. Note: When you track a table, by default all columns will also be tracked.
- In the Settings page, define the table’s Replication Method and, if using Key-based Incremental Replication, its Replication Key.
- Repeat this process for every table you want to replicate.
After you finish setting up Microsoft Azure, its Sync Status may show as Pending on either the Stitch Dashboard or in the Integration Details page.
For a new integration, a Pending status indicates that Stitch is in the process of scheduling the initial replication job for the integration. This may take some time to complete.
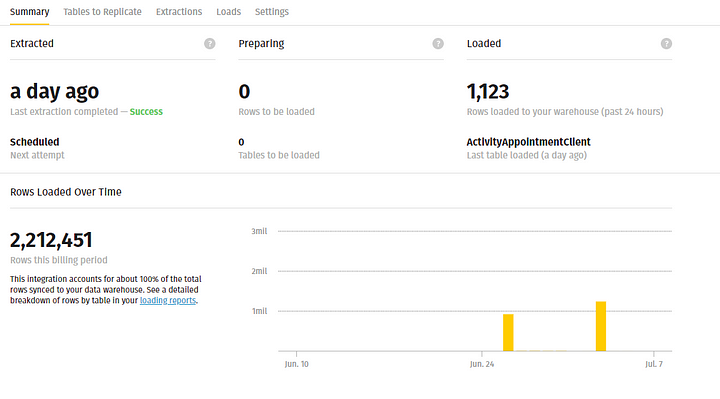
After the Replication has been done, You can see the summary on your dashboard which looks like this:
Read Full Documentation here.
In the next chapter, I’ll write what happens to these data while transferring to BigQuery, How SQL Bucket works in Google Cloud Platform, and How efficient BigQuery is when it comes to creating a Data Warehouse.
UPDATE :
Here’s the next part
So, as you can see, the above screenshot will summarise our job. Now, We want Stitch to know that the destination of…www.jayasekara.blog
Thank you!


1 Comments
Microsoft Azure has revolutionized the way businesses operate in the digital realm. As organizations worldwide migrate to the cloud, the demand for skilled Azure professionals is soaring. With APTRON Solutions' Microsoft Azure Fundamentals Training Course in Noida, you can dive into this dynamic field and position yourself for lucrative career opportunities.
ReplyDelete