You won’t GIT enough of this. 👀
In this article, I’m going to guide you through step by step on how to create a GitHub enterprise server on AWS Ec2 instance.
Step 01- Sign up for GitHub Enterprise
First, click here and signup for the GitHub enterprise.
With the signup, you’ll get 45 days free trial which gives you more than enough time to explore all the features in Github.
After successfully sign up, log in to your account and you’ll be redirected to this screen.
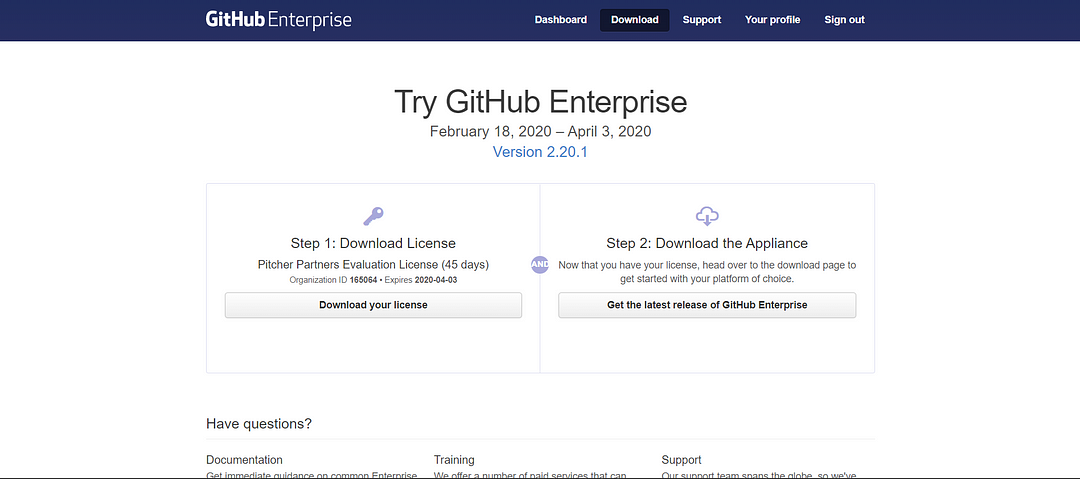
As the first step, Download the License and keep it in a safe place.
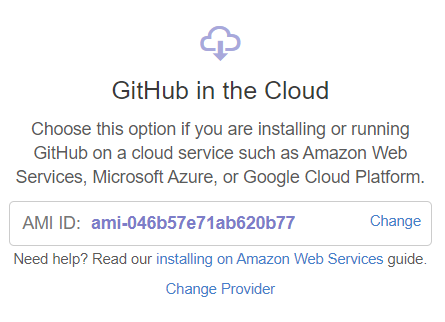
Step 2 would be downloading the Appliance which is in our case Amazon Web Services aka AWS. Click on your region and it’ll provide you an AMI ID which can be used to create an EC2 instance in AWS Console.
In a simple point form:
- Navigate to the GitHub Enterprise Server download page.
- Click Get the latest release of GitHub Enterprise Server.
- In the Select your platform drop-down menu, click Amazon Web Services.
- In the Select your AWS region drop-down menu, choose your desired region.
- Take note of the AMI ID that is displayed.
Step 02-Create EC2 instance on AWS
Login to AWS Console and EC2 services.
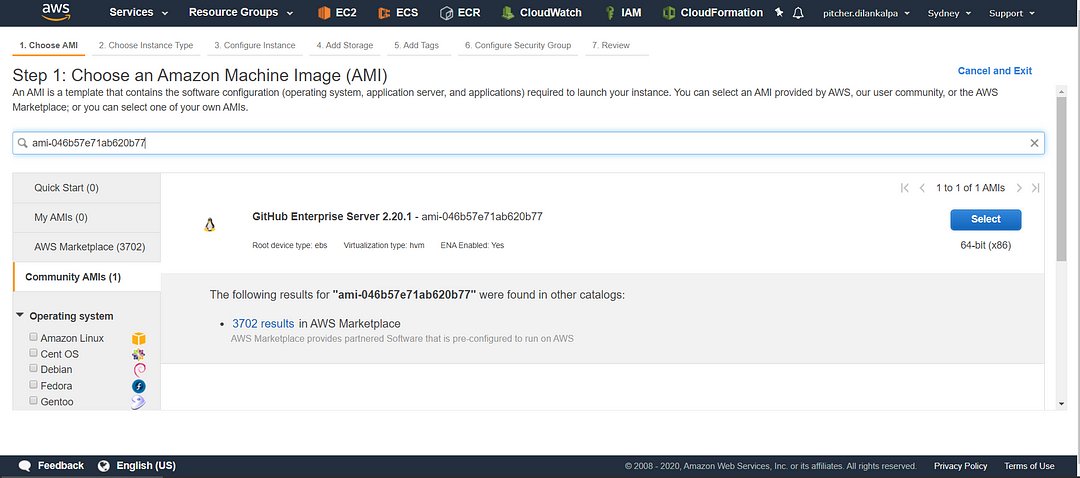
Go to launch an instance and select community AMI’s from the left navigation bar then paste the above AMI ID for the following region.
Supported instance types
GitHub Enterprise Server is supported on the following EC2 instance types. For more information, see the AWS EC2 instance type overview page.
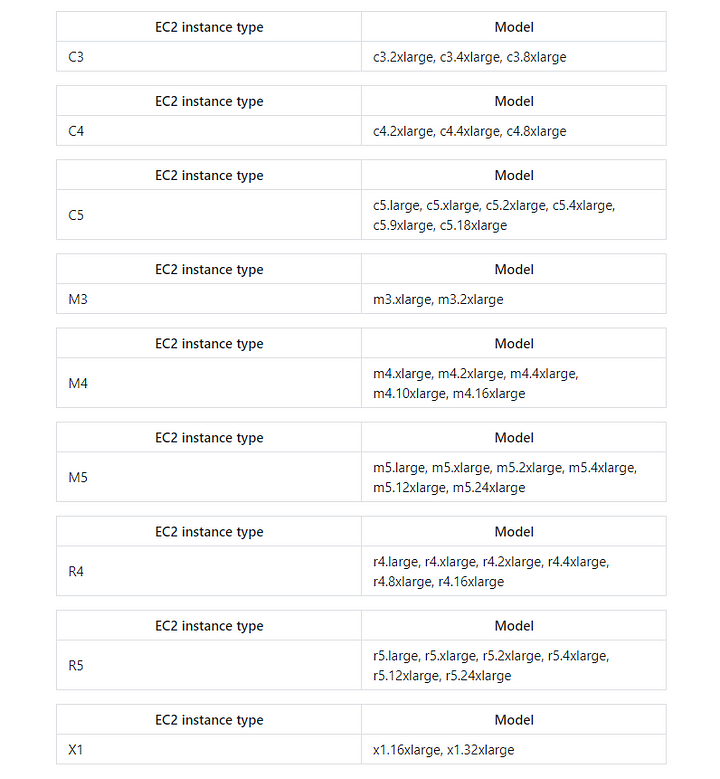
You can select a free tier micro-level model too but after you initiated the ec2 and try to login to the server using DNS or IP address you’ll see an error message indicating the model doesn't support for GitHub enterprise. So be mindful to pick either one of the above models according to your needs.
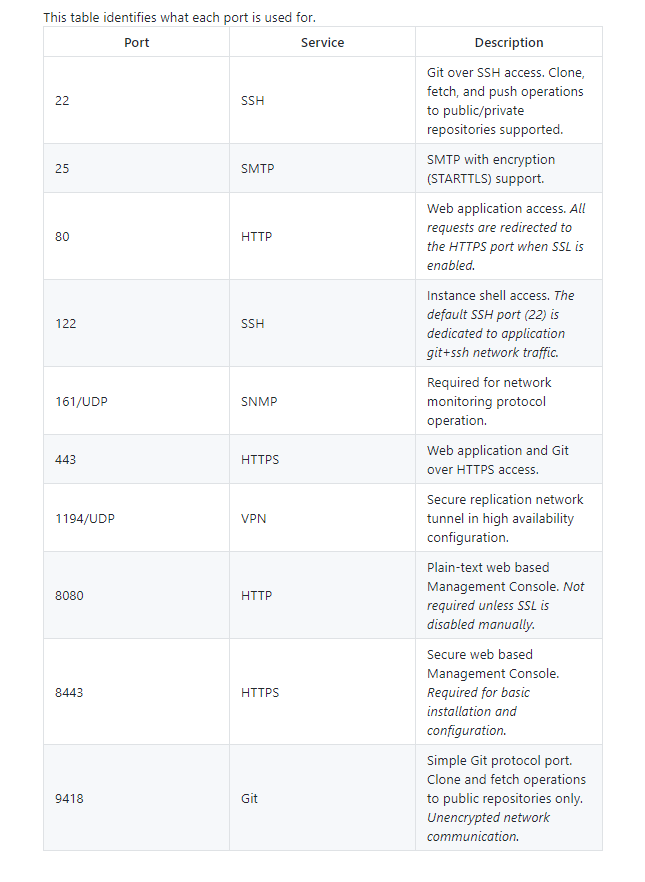
If you’re setting up your AMI for the first time, you will need to create a security group and add a new security group rule for each port in the table below. For more information, see the AWS guide “Using Security Groups"
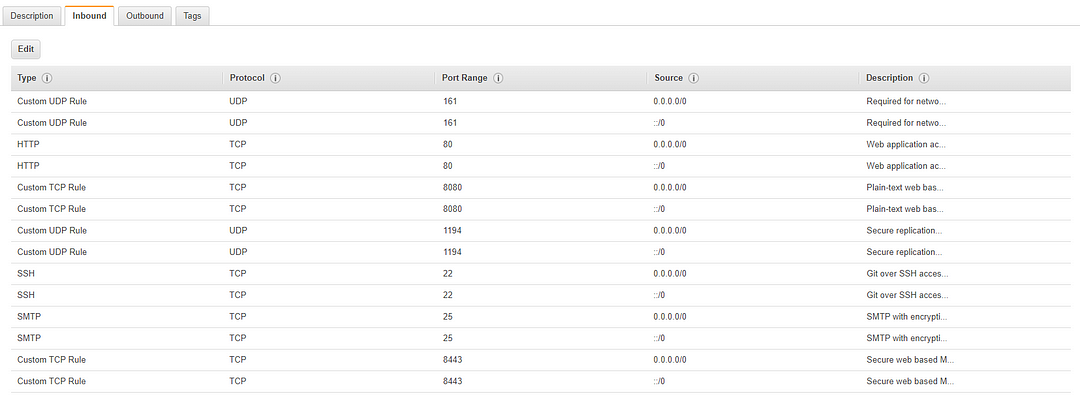
Let’s take a sneak peek at the security group rules I’ve declared:
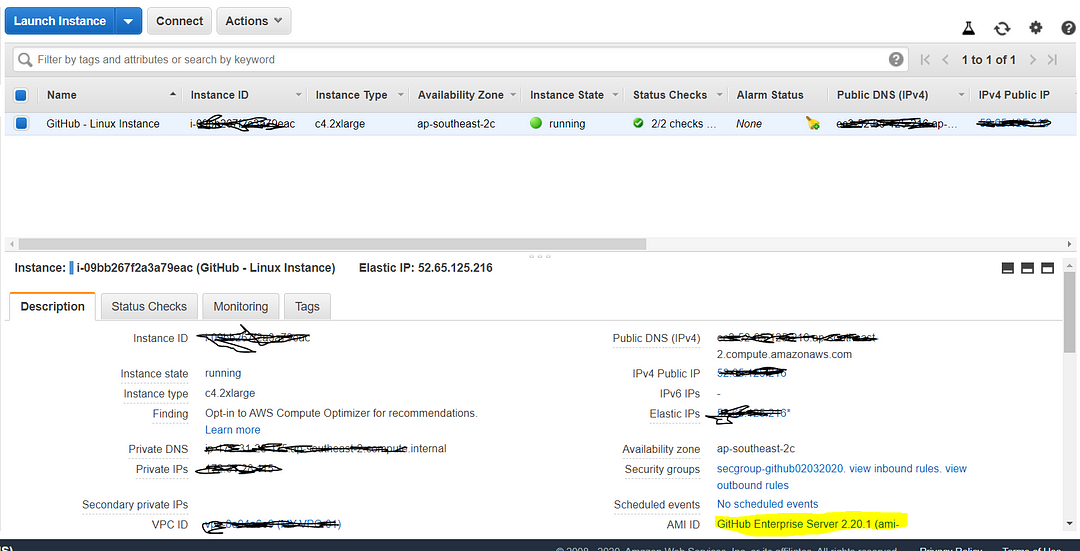
Alrighty! Let’s launch the instance.
Step 03 — Let’s attach some Volumes!
3.1 Create Volumes
- Open the Amazon EC2 console at https://console.aws.amazon.com/ec2/.
- In the navigation pane, choose Elastic Block Store, Volumes.
We’re going to need two Elastic block storages for the GitHub Enterprise Server AMI EC2 instance we have just created.
- Main Storage ( Min 100GB )
- Secondary Storage (Min 10GB)
Refer to the following screenshot regarding Creating a Volume
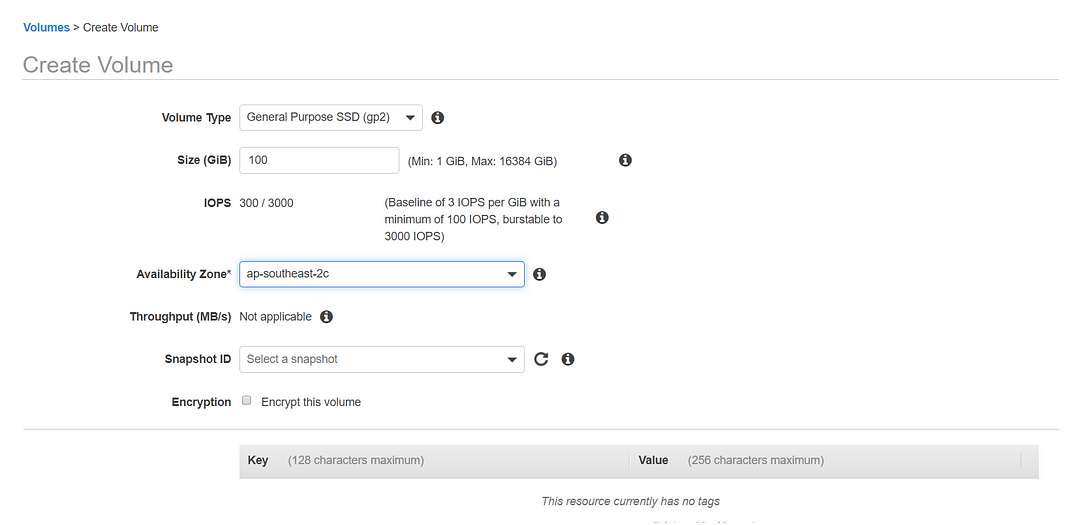
NOTE: Remember to select the correct Availability Zone for both the Main and Secondary Storages.
Let’s take a sneak peek at our two volumes:

3.2 — Attach Volumes
- Select an available volume and choose Actions, Attach Volume.
- For Instance, start typing the name or ID of the instance. Select the instance from the list of options (only instances that are in the same Availability Zone as the volume are displayed).
- For Device, you can keep the suggested device name, or type a different supported device name. For more information, see Device Naming on Linux Instances.
- Choose Attach.
- Connect to your instance and mount the volume. For more information, see Making an Amazon EBS Volume Available for Use on Linux.
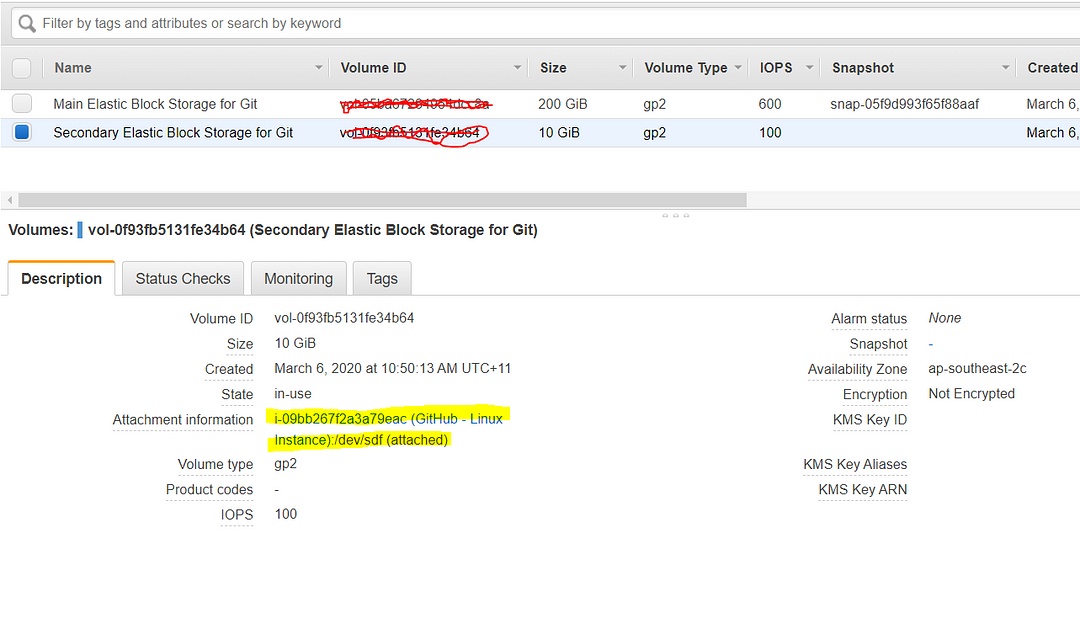
How do I make sure the Volumes are attached? Simple. Select one of the Volumes and verify the details under Description.
Step 04: We’re almost there!
- Open the Amazon EC2 console at https://console.aws.amazon.com/ec2/.
- Select and copy the Public DNS address under description and paste it on your browser window.
Click on Next until you see the GitHub Management Console which looks similar to this:
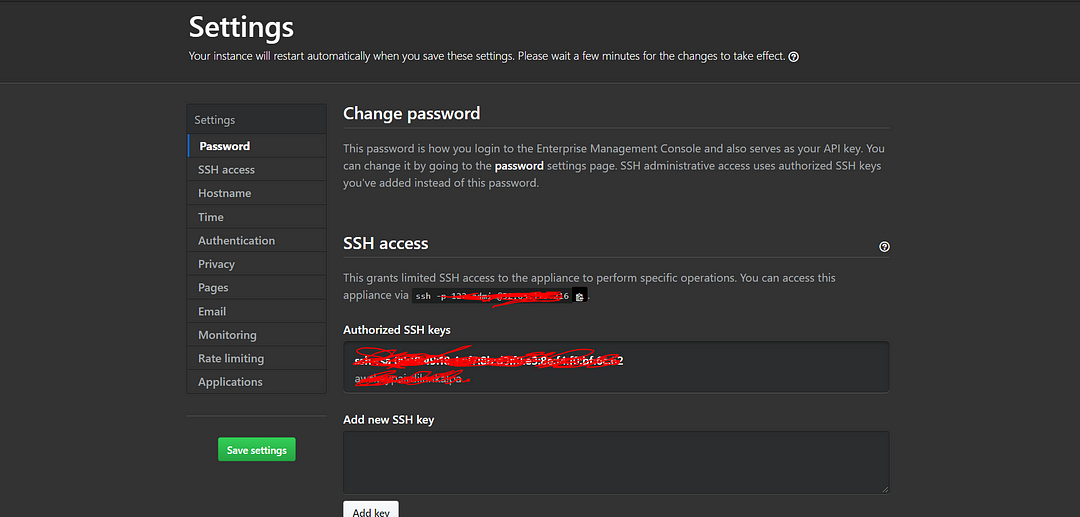
As like that, We have successfully established the GitHub server on an Amazon EC2 instance.
Now I want to teach you ( I’m sure most of you already know this ) how to attach an elastic IP address for our DNS because I hate to my URL looks like an amazon product SKU URL ( I know right!)
In order to do that:
To allocate an Elastic IP address
- Open the Amazon EC2 console at https://console.aws.amazon.com/ec2/.
- In the navigation pane, choose Elastic IPs.
- Choose Allocate Elastic IP address.
- For Scope, choose either VPC or EC2-Classic depending on the scope in which it will be used.
- (VPC scope only) For Public IPv4 address pool choose one of the following:
- Amazon’s pool of IP addresses — If you want an IPv4 address to be allocated from Amazon’s pool of IP addresses.
- My pool of public IPv4 addresses — If you want to allocate an IPv4 address from an IP address pool that you have brought to your AWS account. This option is disabled if you do not have any IP address pools.
6. Choose Allocate.
7. Under Description in EC2 console, you’ll see Elastic IP address assigned to the instance.

Use this IP address to log in to your GitHub server.
Thanks a lot for staying with me this far. In my next article, I’ll explain how to assign your own domain name for the IP address using AWS Route53 and setup Email Notification in the GitHub server with the help of AWS SES.
Meantime: Check out my other articles tags with AWS
So I was thinking of a solution to tackle this issue? And here it is: That's right. We're going to use the Amazing Web…www.jayasekara.blog
Now, I don't wanna repeat the same thing so If you haven't read my previous post regarding AWS and Docker containers…www.jayasekara.blog


0 Comments